Building a Home Server (Part 1)
This project has been a long time coming. I built my first NAS with the original Raspberry Pi. I plugged in an external drive and accessed the files from the local network. Centralizing the bulk of my storage meant I could use phones, tablets, and the TV to access media and documents, not just my desktop. I’ve wanted a “proper” NAS ever since.
Before going further, I want to disclose the extent of my use of LLMs to write this post. I used ChatGPT to get short summaries of server OSes and generate tables. Everything else is good ol’ me.
First real NAS
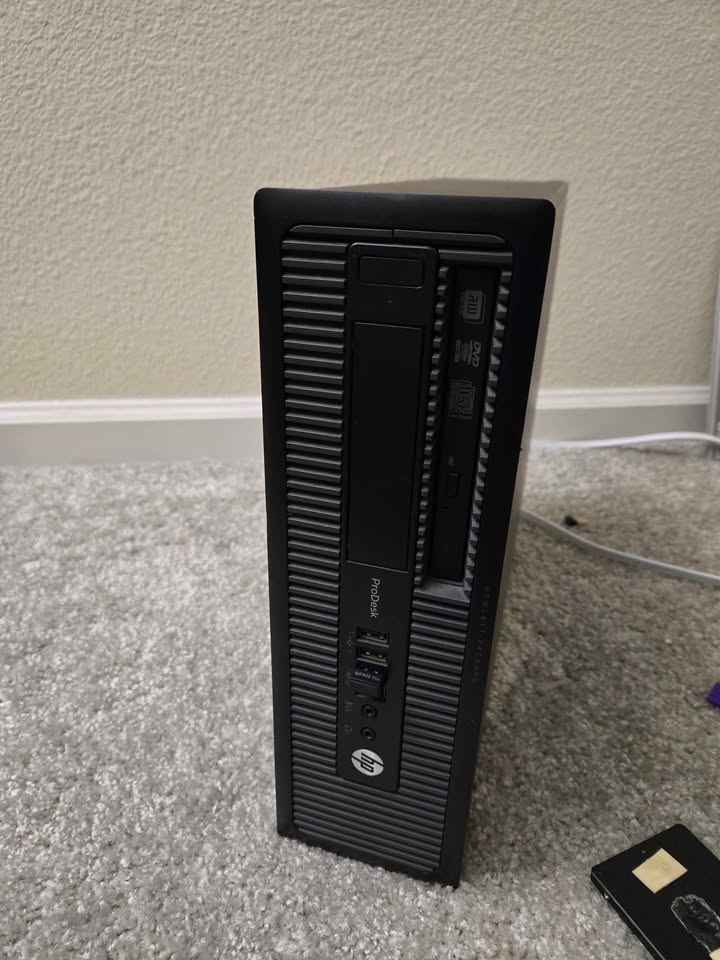
Over the years, I’ve been keeping an eye on r/homelab and r/datahoarders and gone down the rabbit hole. Eventually, in 2022, I bought a used HP Prodesk 600 G1 small form factor PC for cheap and installed some hard drives I already had.
Side note: these used office PCs, a few generations older, are awesome price-to-performance hardware for regular computer tasks, app servers, and a ton of other projects. I especially love the tiny form factor PCs from the big 3 companies (Dell, HP, Lenovo). Check out this great write-up (video version also available there) by ServeTheHome
For the operating system, I narrowed down a few options: OMV (Open Media Vault), Unraid and ZFS seem to be the popular choices, in increasing order of complexity. Here’s a summary from ChatGPT:
ZFS: Combines filesystem and volume management with checksums, snapshots, and copy-on-write to ensure data integrity and simplify storage pooling.
- Pros: End-to-end data integrity; snapshots & clones; pooled storage; compression & deduplication; scalable.
- Cons: High RAM & CPU usage; complex setup; limited drive expansion flexibility; recovery can be slow; not native on Linux without extra modules.
Unraid: Uses a single-parity disk system with independent data drives, allowing flexible drive addition, mixed sizes, and selective parity protection.
- Pros: Easy to add/remove drives; mix drive sizes; Docker/VM support; simple parity; good for media/storage pools.
- Cons: Single parity limits redundancy; slower rebuilds; proprietary licensing; limited filesystem features; not ideal for high-write workloads.
OMV (OpenMediaVault): Debian-based NAS management system providing traditional filesystems (ext4, XFS, Btrfs) with software RAID, SMB/NFS sharing, and plugin-based services.
- Pros: Lightweight; Debian-based; plugin ecosystem; standard RAID support; flexible filesystem choice.
- Cons: Less advanced data integrity (depends on filesystem); manual snapshots; GUI can be basic; scaling complex setups is harder; fewer built-in redundancy features.
I was inclined to use Unraid because it is made for JBOD (Just a Bunch Of Disks), has built-in redundancy, and looks good. Unfortunately, blocking updates after 1 year behind a paywall was a dealbreaker for me. I don’t begrudge them for monetizing the project, but it was just not for me. It felt like another perpetual external dependency.
I was inclined to use Unraid for its JBOD (Just a Bunch Of Disks) support and built-in redundancy, but the one-year paywall was a dealbreaker. I respect their monetization, but it added an unwanted dependency.
ZFS is another popular choice, but it has rigid disk setup rules (so no JBOD) and requires a substantial up-front investment in storage and RAM. But the real dealbreaker was that I couldn’t pull a drive and access its data elsewhere once it’s in a ZFS pool.
That left Open Media Vault, so I installed it and exposed the storage to the local network using SMB. Having access to my collection of family photos, media, projects, etc, on a home network was very convenient, and I started thinking of my peripherals more as terminals than data stores.
Growing needs
This OMV server was doing fine as a NAS, though it had its limitations.
- SMB wireless streaming was enough to stream media, but not file transfers.
- The UI is clunky; changes require saving and reloading.
- Backup/restore of configs required community add-ons.
This was still fine, but I wanted to level up from a NAS to a Home Server, so I can learn and experiment with Kubernetes, Spark, LLM stacks, self-hosting with Nextcloud, home automation, and more. The available add-ons addressed most of these use cases. And even if they didn’t, OMV is built on Debian, so I could’ve installed anything I wanted alongside OMV. But it was time to rethink this properly.
Levelling up to a Home Server
Let’s recap my usecases so far:
- NAS
- Media server
- Self-hosted services
- Platform to experiment and learn
One thing is missing here: a good backup strategy. Ooooh boy.

I was aware of this glaring flaw all this time, but I kept ignoring it. This only caused my sense of worry to grow over time, so I wanted to fix it this time. To plan a backup strategy, I had to understand my data sources. I quickly realized that I needed a lot more storage than I had (around 18TB) to automate backups and centralize data across all my devices for at least the next few years. I also wanted parity protection, because while none of my hard drives have failed yet, they eventually will.
Home Server 2025
As I was interested in a platform for experimentation, I decided to try Proxmox as the OS on bare metal. It’s a hypervisor, so I can bring up and tear down VMs without worrying about the server’s stability. With that out of the way, let’s start with my goals for this home server.
Design Goals
- Storage flexibility disks pulled from a server should still be readable, can add more random disks later
- Protect against disk failures because drives will fail, it’s only a matter of when
- Low-dependency software stack simple tools over complex frameworks, every dependency beyond Debian needs to be justified
- Replicable software stack can set up the entire stack with completely new hardware, predictably and quickly
- Automate everything set up and forget, and make the backup workflow as painless as possible
- Monitoring and alerting no silent failures or surprises
- Data categorization not all data is equal, treat categories differently (more on this later)
- Recovery-friendly recovering from hardware or software failures should be painless and well-documented
- Off-machine and offsite backup to protect against total hardware failure or loss of access to hardware (https://rsync.net/)
- Efficient idling run cool and sip power
- Tiered caching improve responsiveness without waking up disks all the time
That’s a lot, and it was going to take me months to do it all, especially because I will be using many of the tools for the first time. But a phased deployment is possible:
Phase 1
- Install base OS on bare metal
- Set up storage pools and parity
- Expose storage to local network (NAS), and host services in Docker
Makes the basics available for use.
Phase 2
- Automate and test scheduled backup
- Automate software stack deployment and test by reinstalling everything on bare metal
- Automate and test offline backup and recovery
Gives confidence in data protection and integrity.
Phase 3
- Set up monitoring, dashboards and alerts
- Integrate into deployment automation and test
Gives confidence in visibility into server health, and can operate mostly hands-off.
Phase 4
- Fine-tune idle efficiency and performance
Data Categorization
As I mentioned earlier, the key to making the best use of available storage is to understand all the sources of new data in my life, and rank them by importance (and a few other factors). For example, I know that I’ll be getting a constant stream of pictures and videos from my family’s phone cameras, and I’ll have a set of critical documents (pay slips, tax records, etc). I’ll also have various projects with git repos and assets, and finally, my media collection. All of these have different importance, read frequency and write frequency.
- Ephemeral OS/runtime data (non-critical)
- Configuration backups and metadata (critical, frequent change)
- Personal documents (Nextcloud, critical, frequent change)
- Camera roll backups (critical, frequent add, rare change)
- Media library (replaceable, parity only; some rare parts backed up)
This table adds a few more details:
| Category | Description | Importance | Write Frequency | Read Frequency | Protection |
|---|---|---|---|---|---|
| Ephemeral | OS runtime, Docker containers, temp data | Low | Frequent | Frequent | Daily Parity |
| Configs | Docker/Proxmox configs, app metadata, DBs for services | High | Frequent | Frequent | Daily parity + backup |
| Documents | Nextcloud docs, multi-device sync folders | High | Frequent | Frequent | Daily parity + backup |
| Photos | Camera roll backups | High | Frequent adds, rare changes | Moderate | Daily parity + backup |
| Media | TV/movies/music/games/software; some irreplaceable | Mixed | Infrequent | Moderate | Daily Parity (rare items backed up) |
The protection level for each category is based on a balance between importance, storage cost, and runtime performance hit.
Category 1 can be rebuilt easily with deployment scripts. Excluding the actual assets (categories 3, 4 and 5), Configs (category 2) is also irreplaceable, or very tedious to rebuild. I put this on a separate SSD dedicated to this purpose. I chose an SSD because this data is frequently read and updated (affecting the performance of services). However, we lose two features offered by HDDs: write endurance and power loss protection. Luckily, enterprise SSDs used in servers usually have high write endurance and capacitor-based Power Loss Protection (PLP). Putting configs on a dedicated SSD also decouples the backup and recovery strategies from the other categories.
2. Hardware Selection and Acquisition
Based on the data categories and usage profiles of each, I decided to get the following storage devices.
Enterprise SSD for Configs
Enterprise SSDs tend to be expensive, but there’s a large market for used SSDs from decommissioned servers. But! The reliability of SSDs which ran in production environments can be questionable. So it’s critical to get the SMART info before purchase. The main SMART attributes to look out for are (in rough order of importance):
- Media and Data Integrity Errors: should be zero.
- Percentage Used / Available Spare: remaining endurance.
- Total Bytes Written (TBW) / NAND Writes: wear level indicator.
- Reallocated/Sector Errors (if present): none expected.
- Unsafe Shutdown Count: excessive = prior instability.
- Temperature History: avoid drives with high max temps.
- Power-On Hours (POH): lifespan usage.
I bought an enterprise SSD with PLP on eBay with good SMART stats: Micron 7300 PRO - 960GB NVMe Gen3, MTFDHBA960TDF-1AW1ZABYY.
Bulk storage drives
Arguably the most expensive part of the build. Common choices for NAS are Western Digital Red or Seagate Ironwolf drives (tuned for NAS). Buying brand new was going to be expensive, and I couldn’t decide how much storage to get. With parity, I wouldn’t even get the full use of the storage space.
My first instinct was eBay. Buying from (re)sellers who deal exclusively in server hardware (check seller’s ratings and history) has a much higher success rate than buying from random people on local marketplaces and websites, even if there is a premium. Not to mention, it’s easier to get matching drive models and sizes. I went with a well-regarded seller recommended on r/homelab: https://serverpartdeals.com. They source server components (including storage), scrub them, recertify them, provide 90-day warranties (unusual on eBay), and they’ve been around for a while. I bought 4x Western Digital Ultrastar DC HC530 14TB, WUH721414ALE600 0F31164. They were available cheaper than other 14TB HDDs, and the specific model has good feedback online.
I was going to use one of them as parity and be done with it, when I found another fantastic deal at a local hardware recycler: 4x Toshiba N300 10TB, HDWG11A drives at $60 a piece. I couldn’t check the SMART values before purchasing, but they were pulled from the same server rack, so I know they’ve run reliably in an enterprise environment. This actually bodes well due to a quirk of HDDs, as I discovered from annual reports released by Blackblaze. This specific blog post sums it up nicely: https://www.backblaze.com/blog/drive-failure-over-time-the-bathtub-curve-is-leaking/. Drives usually last around 5-6 years, and if a drive is going to fail, it will fail early. If it passes that initial run time, it is likely to last for a long time before wear-related failures become more probable.
I rushed home, plugged them in and checked the SMART stats, and I was not disappointed. The SMART attributes were excellent, and the drive had been running for 1264 days 24/7.
Next, I researched the models online to get a better understanding of their strengths and weaknesses. My primary concern is to balance idle power usage with drive wear. I could spin down the drives when not in use, but frequent spin-up and spin-down cycles wear out HDDs faster, due to the electrical, thermal, and mechanical shocks. It turns out that both models have excellent resiliency and are meant to run 24x7, but their data sheets don’t mention much about spin-cycling. I’ll have to make a choice between keeping them idle, or spinning them down completely based on usage patterns and data organization. Keeping them spinning is a good default behaviour (at the cost of idle power consumption), but I have thought about this and have a strategy involving mergerfs policies. Premature micro-optimization, I know, but I scratch this itch on my hobbies, so I don’t do it on the job! I’ll go into more detail later in a following post, where I discuss the software stack and configuration.
Large SSD for tiered cache
I want to keep the hard disks spun down as much as possible. I was thinking of how to approach this, and which drive to keep online 24/7. The Ultrastars were the obvious choice, but I got too used to SSDs lately, and the idea of a disk always spinning irked me. So I looked online, and I found a 2TB SSD on eBay from a reputable seller. It was an enterprise model, but it was very cheap, because it had 5% wear. That leaves 95% of the cells usable. This was a good trade-off for a cache drive, so I pulled the trigger.
Other hardware
A lot of research and luck went into the rest of the components (especially and surprisingly the PSU and case), but I’ll keep it short. I tried to optimize for the lowest idle power consumption while still capable of occasional heavy workloads.
- CPU: Intel i5-12400 (refurbished) High single-thread performance and power efficiency, QuickSync hardware video transcoding.
- Motherboard: ASRock B660M Pro RS, MicroATX (refurbished) Budget-friendly, stable, supports NVMe; no ECC validation but adequate for home server reliability.
- RAM: 32 GB DDR5 6000 CL30 (used). Sufficient for caching, VMs, and database workloads.
- PSU: XPG Core Reactor II, 650 Watt (new) Great efficiency at typical operating wattage, Cybenetics Platinum tier.
- OS SSD: 256 GB SATA/NVMe (used) Dedicated to Proxmox + runtime.
- Case: Fractal Design Define R5 (new) Modern cases don’t fit 8 HDDs, old cases do, but couldn’t find any for a good price.
- NIC: Mellanox ConnectX-3 Pro CX312B (used) Good balance between speed and idle power efficiency, 10 Gigabit.
- HBA: 9207-8i, 6Gbs, SAS2308, PCIe 3.0, IT Mode Storage expansion option with good idle power efficiency.
Next up is the software stack, but I’ll save it for part 2.
Peace!